Guide to set up virtual machines on Fedora
Table of Contents
Overview
- Personalize Fedora desktop
- Install virtualization software (libvirt, virt-manager, qemu-kvm)
- Set up a private network between the Windows 11 and Kali Linux VM
- Set up a Windows 11 VM without internet access
- Set up a Kali Linux VM with internet access
Hardware
- Lenovo Thinkpad X1 Carbon - 9th Generation
Begin
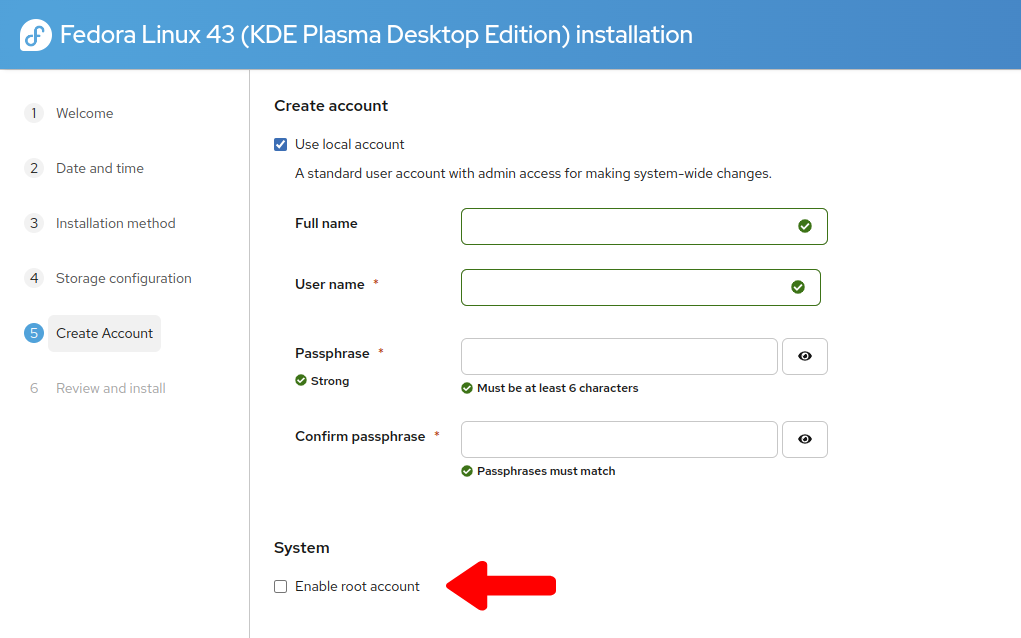
During the Fedora installation wizard
Uncheck Enable Root user
(Optional) Fedora Desktop Configuration
Task Manager (aka Taskbar in Windows)
Disable floating Task Manager:
- Right-click Task Manager
- Select Show Panel Configuration
- Set Floating to Disabled
Pin Konsole to Task Manager:
- Open the Application Launcher
- Search or type Konsole
- Right-click Konsole
- Pin Konsole to Task Manager
Set DNS to Cloudflare
-
Right-click the Wi-Fi icon in the tray icon area
-
Select Configure Network Connections
-
Select the IPv6 tab
-
Set Method to Disabled
-
Select the IPv4 tab
-
In Other DNS Servers, type 1.1.1.1, 1.0.0.1
-
Click Clipboard in the “tray icon area”
-
Click the Configure Clipboard icon (two lines)
- Uncheck Clipboard history
- Set History size: 1 entry
System Settings
Display & Monitor
- Uncheck top-left corner to disable the “hot corner”
Mouse & Touchpad > Touchpad
- Pointer speed: 0.40
- Check Enable pointer acceleration
Mouse > SYNA8008:00 06CB:CE58 Mouse
- Pointer speed: 0.00
- Check Enable pointer acceleration
Mouse > TPPS/2 Elan TrackPoint
- Pointer speed: 0.40
- Uncheck Enable pointer acceleration
Wallpaper
Colors & Themes
- Global Theme: Breeze Dark
Power Management
- When inactive: Do nothing
- When power button pressed: Lock screen
- When laptop lid closed: Do nothing
- Turn off screen: Never or 30 minutes
Copy or add minor battery adjustments to On Battery and On Low Battery
Screen Locking
Lock screen automatically: Never
Dolphin (File Manager)
Set View Settings to detailed list like Windows:
- Click the down arrow in the View Settings icon in the toolbar
- Select Details
- Select the Zoom’s minus button until it is greyed-out
Add convenient Toolbar Actions:
- Right-click the top bar (to the left of the address bar)
- Configure Toolbars
- Add Up to the right of Forward
- Add Refresh to the right of Up
- Add Places next to View Settings
- Add New Tab and New Window to the right of Split
Virtual Machine Manager
Reference https://docs.fedoraproject.org/en-US/quick-docs/virtualization-getting-started/
# Check CPU virtualization support
grep -E '^flags.*(vmx|svm)' /proc/cpuinfo

# View the Virtualization Package Group
dnf group info virtualization

# Install the Virtualization Package Group
sudo dnf @virtualization

# Start the libvirtd service
sudo systemctl start libvirtd

# Start the service on boot
sudo systemctl enable libvirtd

# Verify that the KVM kernel modules are properly loaded
lsmod | grep kvm
Creating the new Windows 11 virtual machine
Download/move Windows 11 and Kali Linux .iso files somewhere (e.g., ~/Downloads):
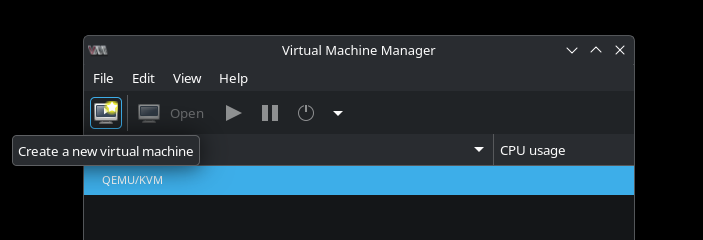
- Open Virtual Machine Manager from the Application Launcher
- Select the Create a new virtual machine icon at the top-left
- Select Local install media (ISO image or CDROM) > Forward
- Select Browse
- Select Browse Local
- Locate the .iso file > Forward
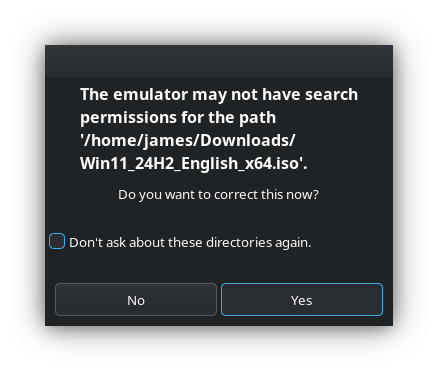
- Select Yes when prompted:
The emulator may not have search permissions from the path ____. Do you want to correct this now?
- This will copy the iso files for Virtual Manager to use, so you can delete the iso files from ~/Downloads.
Recommended minimum virtualized specifications (Windows 11):
- Memory: 4096
- CPUs: 2
- Create a disk image for the virtual machine: 64.0 GB
Before selecting Finish:
- Check Customize configuration before install
- Set Network selection: Virtual network ‘default’: NAT
Virtualized hardware details (Windows 11)
Overview
This ensures the Windows 11 Secure Boot requirement:
Firmware:
UEFI x86_64: /usr/share/edk2/ovmf/OVMF_CODE_4M.secboot.qcow2
Boot Options
- Check SATA CDROM 1
- Move it above SATA Disk 1
NIC
Prevent Windows 11 installation configuration from accessing the internet:
- Uncheck Link state
- Device model: virtio
Begin Installation
- When finished, select Begin Installation at the top-left
Windows Desktop
More resolutions in Windows 11’s Display settings:
Download the drivers:
# Open Konsole and paste:
wget https://fedorapeople.org/groups/virt/virtio-win/direct-downloads/latest-virtio/virtio-win.iso
- Open Virtual Machine Manager
- Double-click the new Windows 11 VM
- Click the blue icon with the “i” at the top-left to show virtual hardware details
- Select SATA CDROM 1 from the left > Browse
- Select Browse Local
- Find and select virtio-win.iso
- Select Power on the virtual machine button at the top-left
- In Windows, go to This PC and run virtio-guest-tools.exe
- Restart
You should now see more resolutions available in the display settings.
Create a virtual machine snapshot
Now is a good time to create a snapshot:
- From the virtual hardware details screen, click the icon with the two monitors located to the right of the blue icon with the “i”
- Select ”+” at the bottom-left
- Verify Snapshot Mode: external is selected
- Select Finish (the snapshot is created almost instantly)
Create the new Kali virtual machine
- Open Virtual Machine Manager from the Application Launcher
- Select the Create a new virtual machine icon at the top-left
- Select Local install media (ISO image or CDROM) > Forward
- Select Browse
- Select Browse Local > locate the .iso file6.
- Uncheck Automatically detect from the installation media / source
- Under Choose the operating system you are installing, type
Debian and select Debian 13 from the list > Forward
My recommended minimum virtualized specifications:
- Memory: 4096
- CPUs: 4
- Create a disk image for the virtual machine: 50.0 GB
Before selecting Finish:
- Check Customize configuration before install
- Set Network selection: Virtual network ‘default’: NAT
Virtualized hardware details (Kali)
Overview
To use without Secure Boot:
Firmware:
UEFI x86_64: /usr/share/edk2/ovmf/OVMF_CODE_4M.qcow2
Boot Options
- Check SATA CDROM 1
- Move it above SATA Disk 1
NIC
Begin Installation
- When finished, select Begin Installation at the top-left
Kali Installation
Hostname:
Domain name:
Real name of the user:
Username for the new account:
Kali Desktop Configuration
Disable screensaver
- Settings Manager > Disable Activate screensaver when computer is idle
Disable automatic sleep and off
- Display tab > Power Manager > Move Put to sleep after and Switch off after to the left until it says Never
Create a private network for the VMs
Go to the Virtual Machine Manager window
Select Edit > Connection Details
Select the Virtual Networks tab
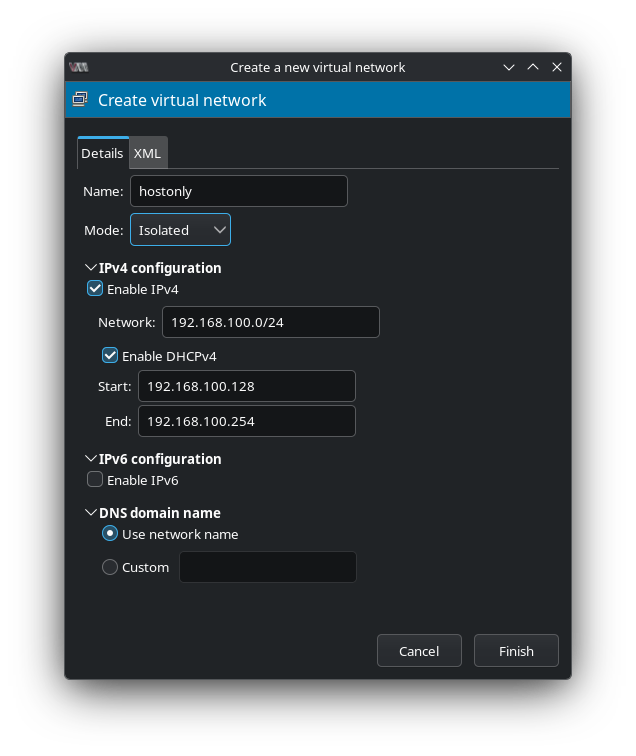
Select the ”+” icon at the bottom-left
Set Name: hostonly
Add the second, new virtual network to both VMs
Topology
                 (Internet)
                     ▲
                     │
            [NAT through Fedora host]
                     │
          ┌─────────────────────┐
          │ Fedora Host (Wi-Fi) │
          └─────────────────────┘
                     │
         ┌───────────┴───────────┐
         │ Private Host-Only LAN │
         └───────────┬───────────┘
                     │
        ┌────────────┼────────────┐
        │            │            │
   Kali VM     Windows 11 VM     (optional other VMs)
The first virtual network is using Network Address Translation to provide internet access through the host’s real network interface. Creating this new one will not use NAT and use a different private subnet, which will only be accessible by VM to VM and Host to VM. We disabled Windows VM’s virtual Ethernet adapter, so it won’t have access to the internet.
- Go to Show virtual hardware details for both VMs and select Add Hardware
- Select Network
- Set Network source: Virtual network ‘hostonly’: Isolated network
- Device model: virtio
Verify Kali VM can “see” the Windows VM
Get Windows IP:
- In Windows VM > Command Prompt, type
ipconfig to get IP
Ping Windows VM from Kali VM
- In Kali VM > Terminal Emulator, type
ping -c 4 <IP_ADDRESS>
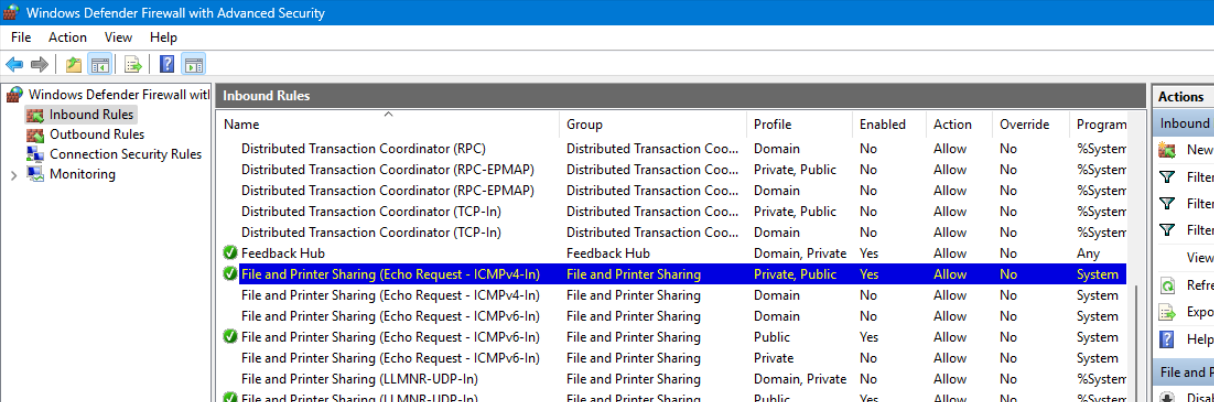
If it is not working, allow ICMP in Windows Firewall
Control Panel > System and Security > Windows Defender Firewall > Advanced settings > Inbound Rules
Assuming Windows is using the Public/Private network setting, enable File and Printer Sharing (Echo Request - ICMPv4-In) for the correct profile.
Enable Network discovery and file sharing
- Once ping works, in Windows VM, go to Settings > Network & internet > Advanced network settings > Advanced sharing settings > Turn on Network discovery and File and printer sharing
Enable folder sharing
- Right-click a folder > Properties > Select the Sharing tab > Select Share > Select Share again
Test the SMB share
- On your host machine, open the file manager, type in the address bar
smb://<IP_ADDRESS> > type the Windows VM’s login credentials to test it is working
- Do not do this from the Kali VM to simulate not knowing the target Windows VM’s SMB credentials